
INSTALLING CSCALP IN 3 STEPS
Thank you for your interest in CScalp! We’ve sent you an email. Let us guide you through the process of starting trading with CScalp in three simple steps. If you prefer video instructions over text, watch our video tutorial.
1Download and Install CScalp
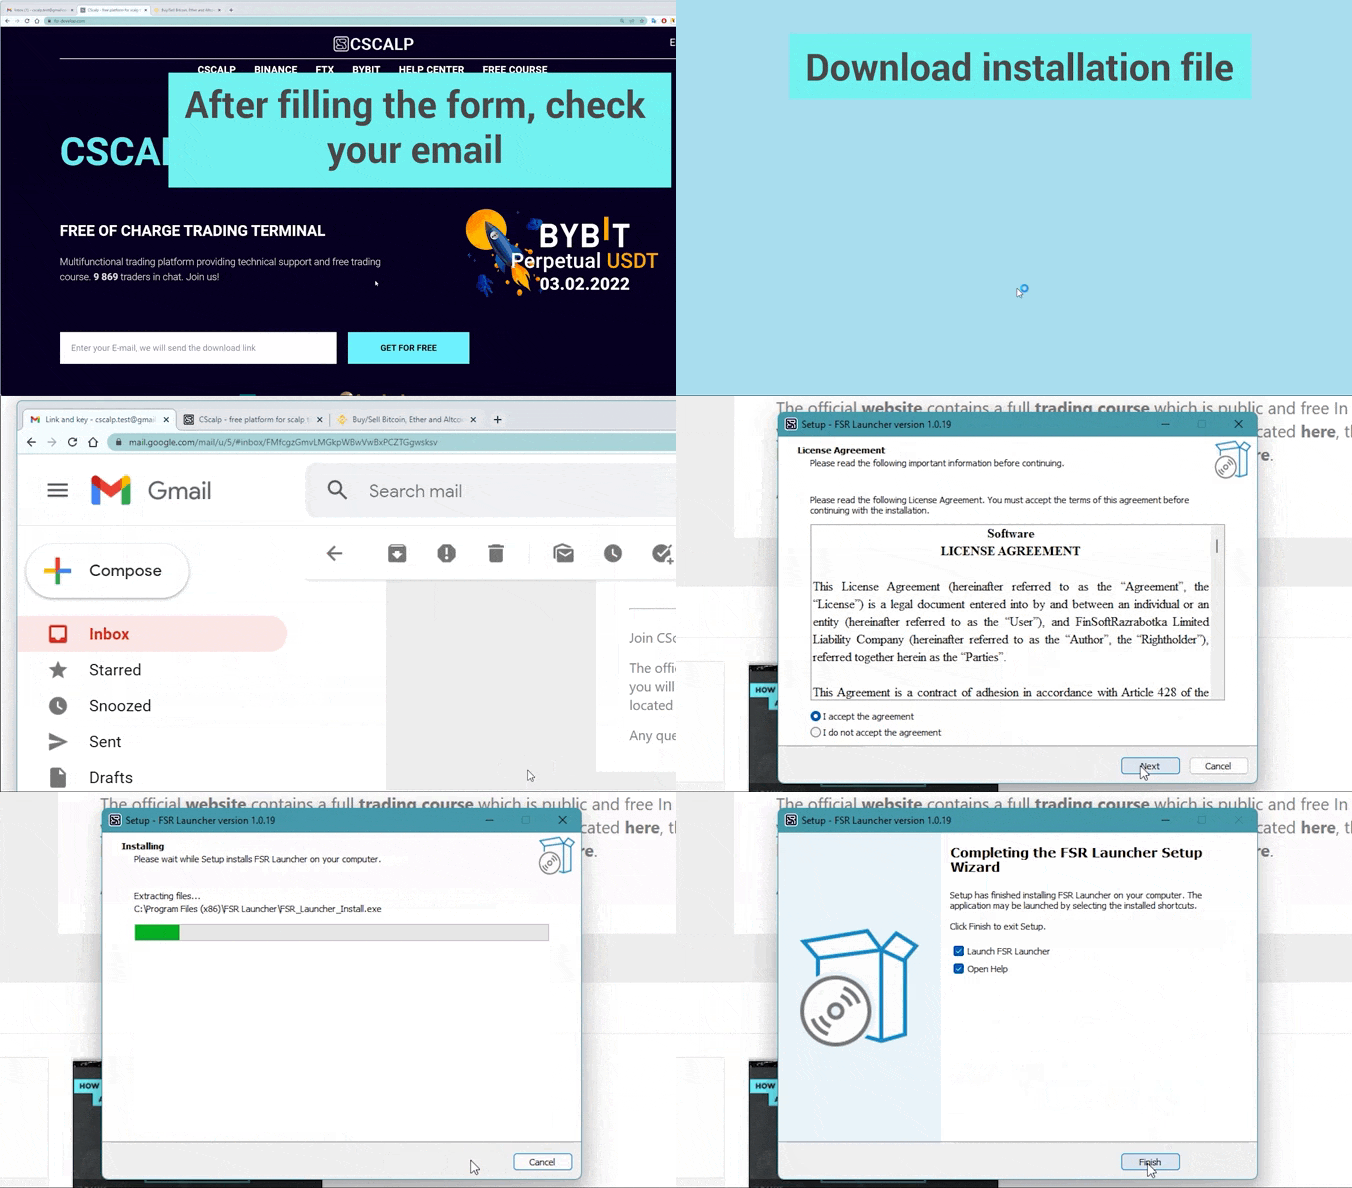
Once you’ve received the email, click the “Download CScalp” button to save the installation file. Also, download the license file from the email (you can find it in the attachments). Save both files to your desktop, as you’ll need them for step 2.
Run the “FSR_Launcher_install.exe” and follow the standard installation procedure. Congratulations, you’ve completed the first step!
2Use the License File
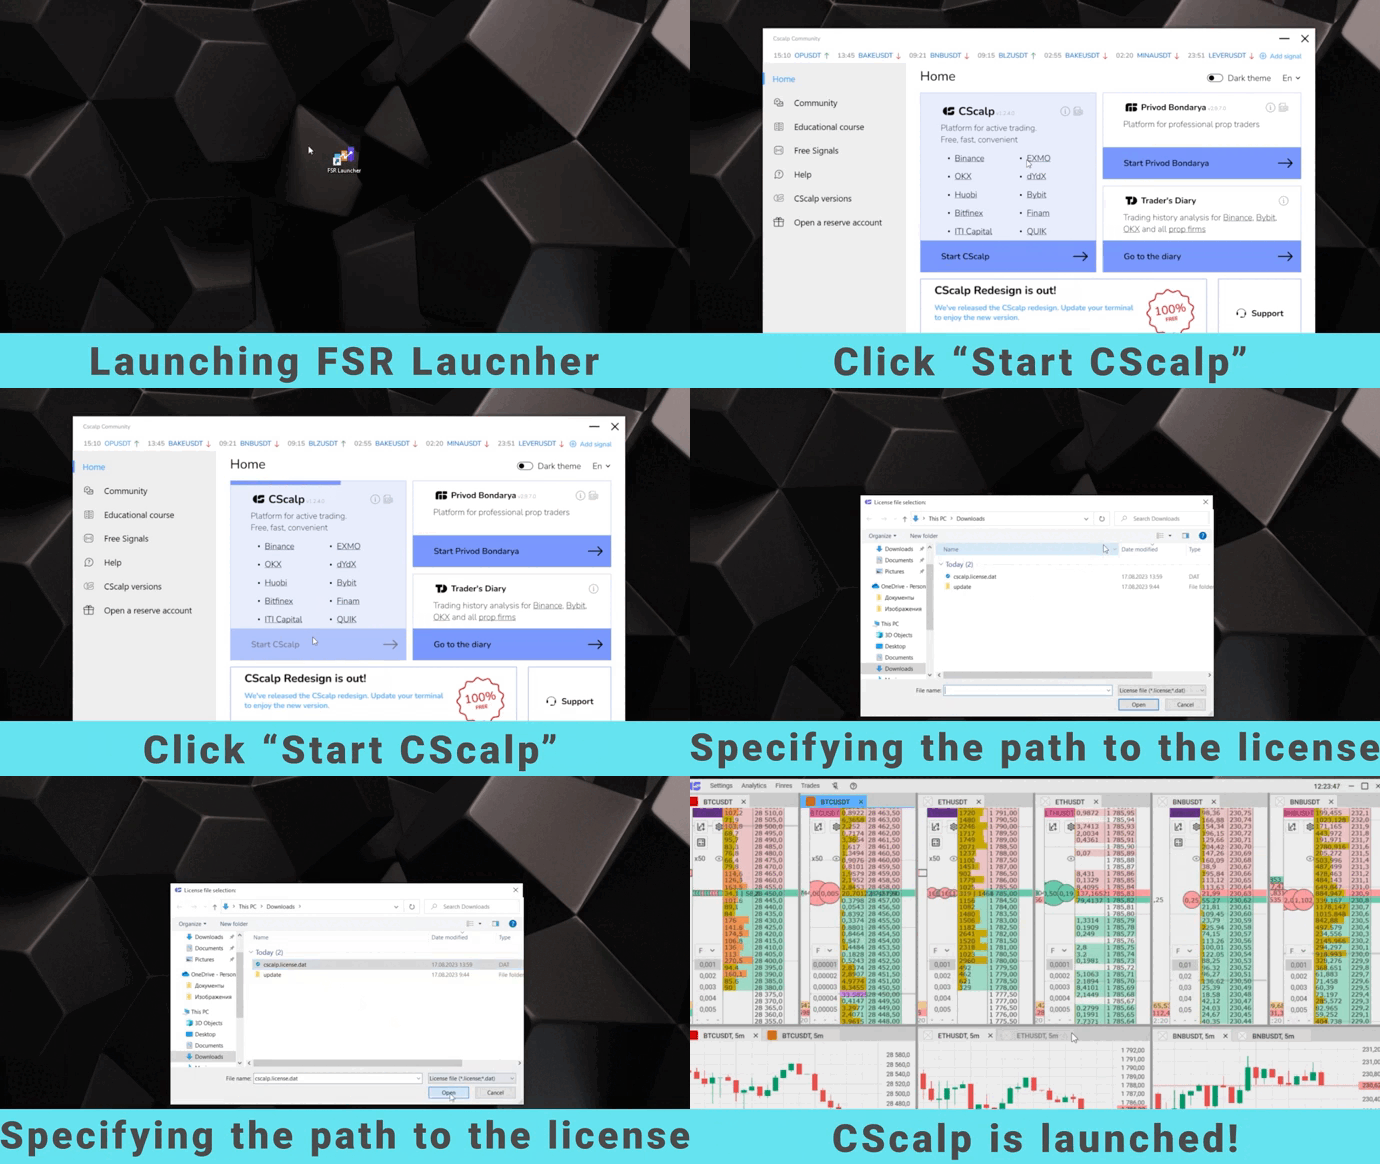
Click the FSR Launcher shortcut to launch the application. Start CScalp through FSR Launcher.
The application will prompt you to provide a license file. Click the folder icon and specify the path to the license file you saved earlier. Then click “OK.” If you’ve saved the license on your Desktop or in the “Downloads” folder, CScalp will automatically locate it.
3Connect to the Exchange
In the top CScalp menu, click “Settings”, and navigate to the “Connections” tab. Choose the exchange and click the gear icon next to it to access the connection settings.
Create API keys with trading permissions in your account on the crypto exchange and paste them into the designated fields. Disable “View mode”, close the settings window, and click the connection icon in the “State” column. The icon will turn green. Congratulations, the installation is now complete, and you can start trading!
Read detailed instructions: How to connect CScalp to Your Preferred Exchange

After setting up the connection, learn how to make your first trade in CScalp.
If you have any questions or encounter any issues, reach out to our support team. We will respond during regular working hours.