
How to Connect CScalp to Bitget
Date of update: 07.08.2025
We have prepared instructions on how to connect the CScalp terminal to the Bitget cryptocurrency exchange. We explain and show how to create API keys in your Bitget personal account, connect CScalp to the exchange, and proceed to your first trade.
Attention! This article is for informational purposes only and does not contain recommendations or calls to action.
The review has been prepared by the CScalp terminal team. You can get CScalp by leaving your e-mail in the form below.
Types of Connections to Bitget in CScalp
CScalp offers connections to the Bitget futures and spot market called “Bitget: Futures” and “Bitget: Spot“.
How to Open an Account on Bitget
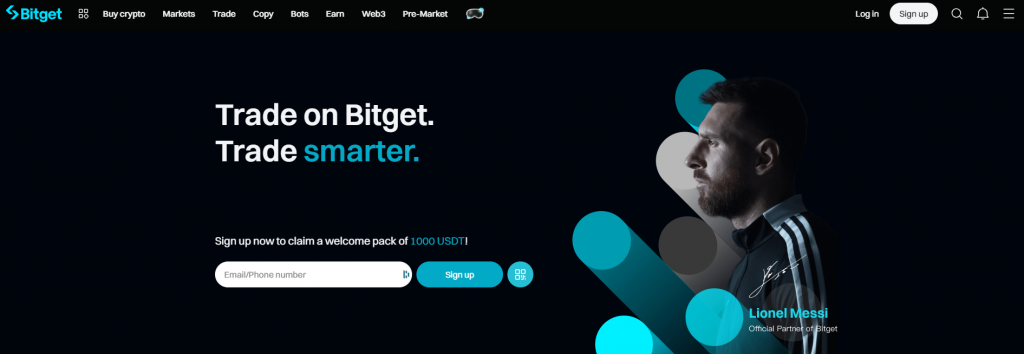
Click “Sign up” to open an account on Bitget
To trade on Bitget, open an account on the exchange. Visit the official Bitget website and click “Sign up“.
Choose a registration method: “Email” or “Mobile“. Enter your email/phone, set a password, provide a referral code (if you have one), read the exchange’s User Agreement and Privacy Policy. Then tick the corresponding checkbox and click “Create Account.”
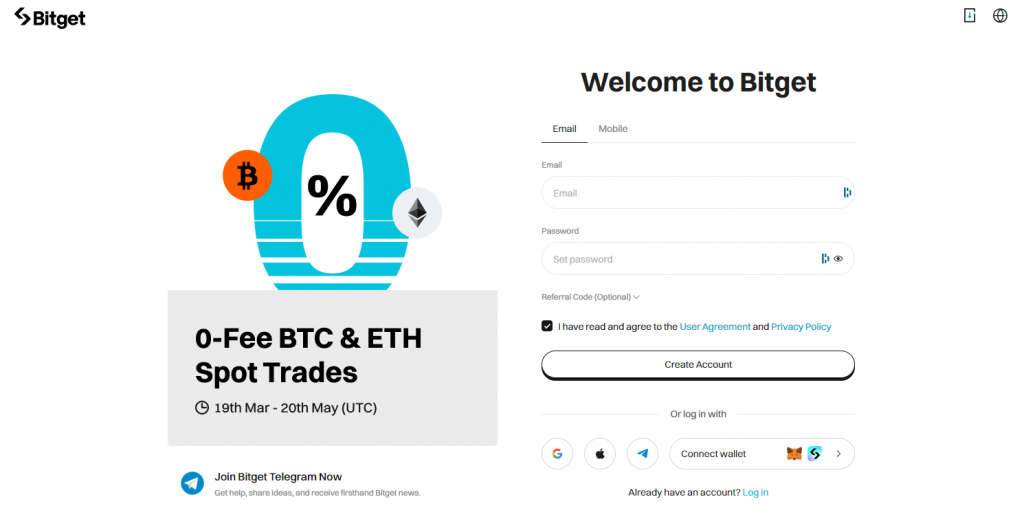
Enter your email/phone, password, referral code (optional), and click “Create Account”
Confirm your email/phone (you will receive a code).
Done, you have opened an account on the exchange. Let’s now create API keys to connect Bitget and CScalp.
How to Create API Keys on Bitget
Connect Two-Factor Authentication
To create API keys on Bitget, enable two-factor authentication (2FA) through Google Authenticator. Without 2FA, the option to create keys is blocked.
On the Bitget website, open the user menu and go to the “Security” section.
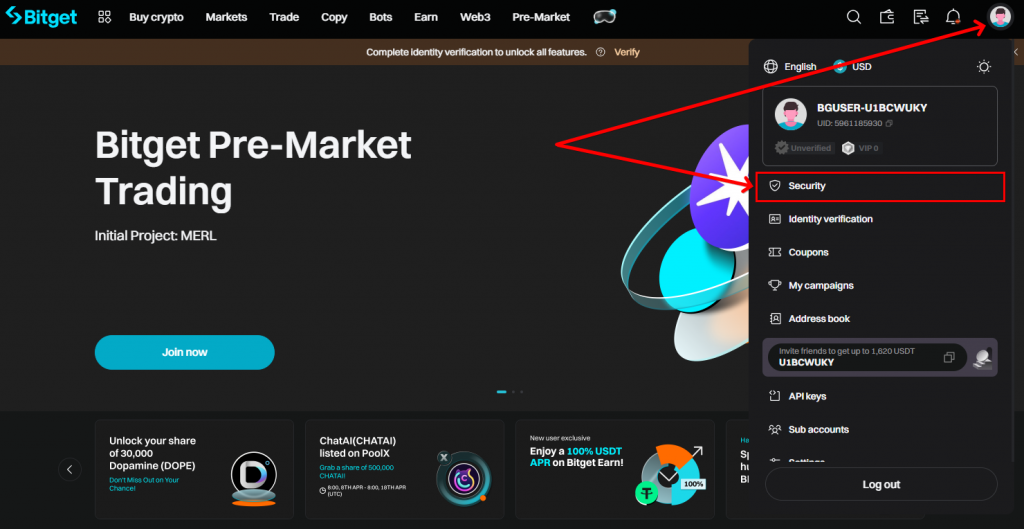
Go to the “Security” section
In the “Google Authenticator (recommended)” block, click “Configure.”
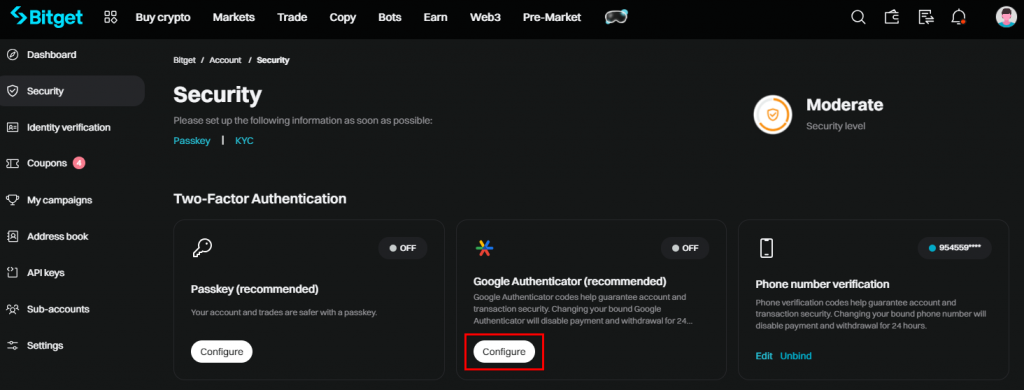
Click “Configure” in the Google Authenticator block
Download the Google Authenticator app on your phone (if not already installed). Open the app, press the “+” icon, and choose how to connect: “Scan a QR code” or “Enter a setup key.” After connecting, enter the code from the app in the respective field and click “Submit.”
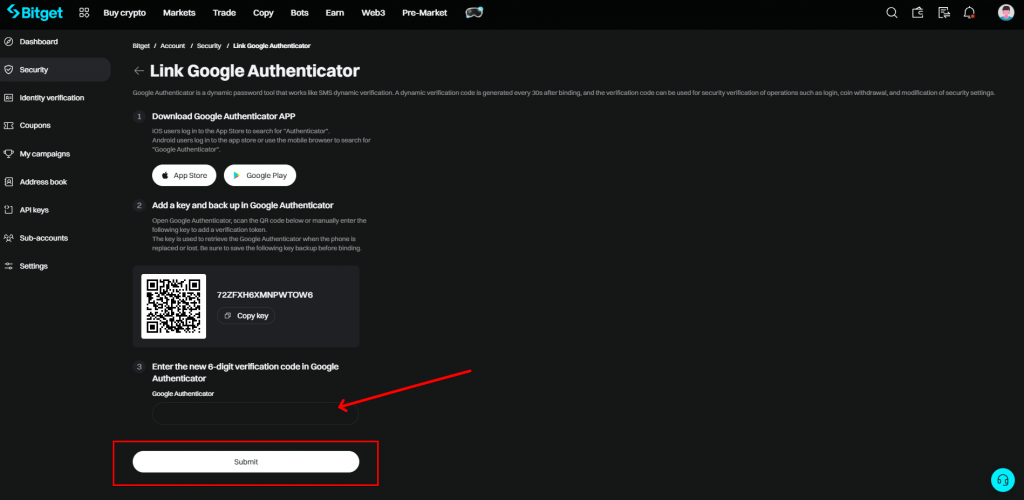
Connect Google Authenticator to Bitget, enter the code from the authenticator, and click “Submit”
Complete the security verification (enter the code from the email/phone). Done, 2FA is connected. Moving on to creating API keys.
Create API Keys
Open the user menu and click “API keys.”

Go to the “API key” section
On the next page, read the API keys Terms & Conditions and click “Agree.”
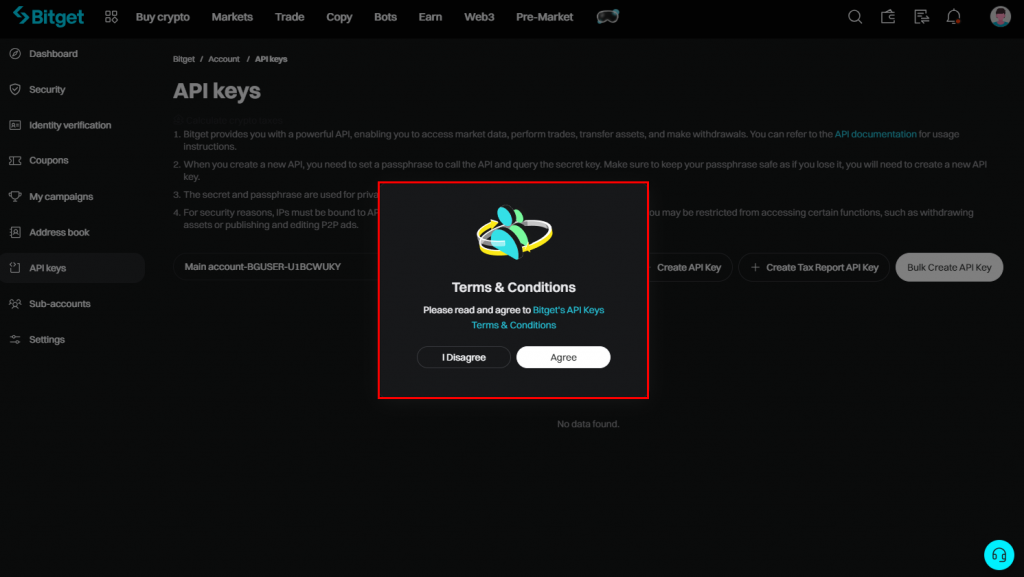
Review and agree to the Bitget API Terms & Conditions
To start creating a key pair, click “+ Create API Key.”
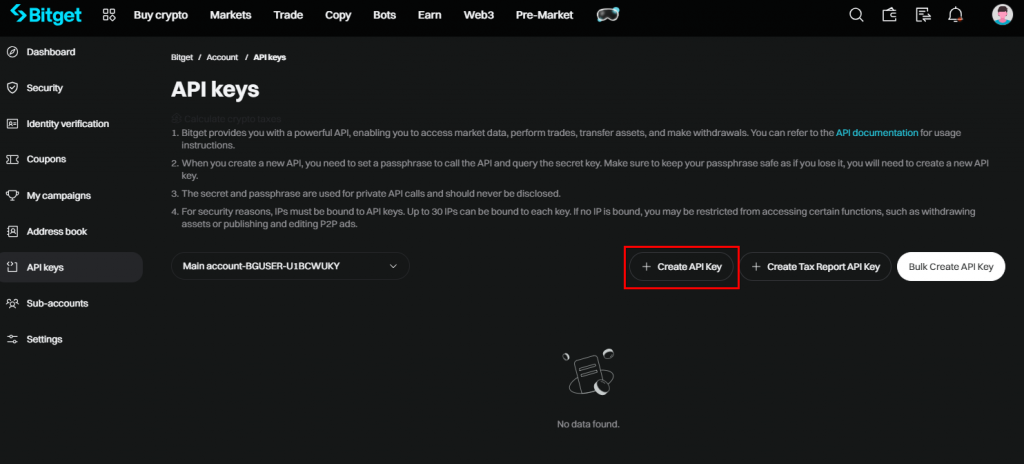
Click “+ Create API Key”
Select API key type: “System-generated API key” or “User-generated API key.” The exchange creates the pair in the first case, while to use the second option you will have to install additional software. We will consider the first option.
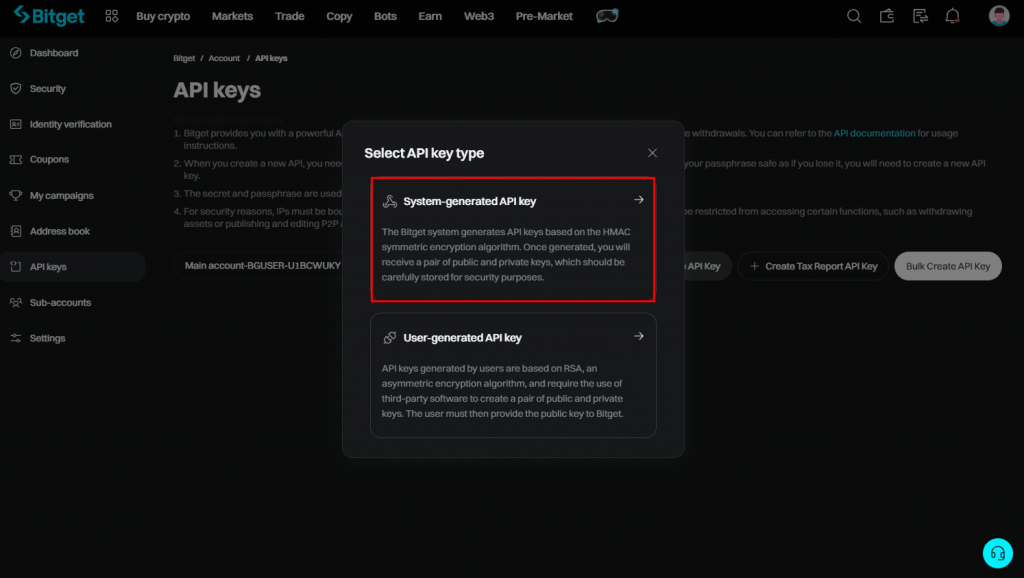
Choose the API keys generation method
Set the following API key parameters:
- In the “Note” field, name your key pair (for example, CScalp)
- In the “Passphrase (API token)” field, set the key’s password
- Enable “Read-write” permission to allow the API keys to transmit trading commands from CScalp to Bitget
- Activate the “Orders” permission in the “Futures” field to send futures orders from CScalp to Bitget
Other parameters are not required for trading on the exchange through CScalp.
Click “Next” and pass the security verification.
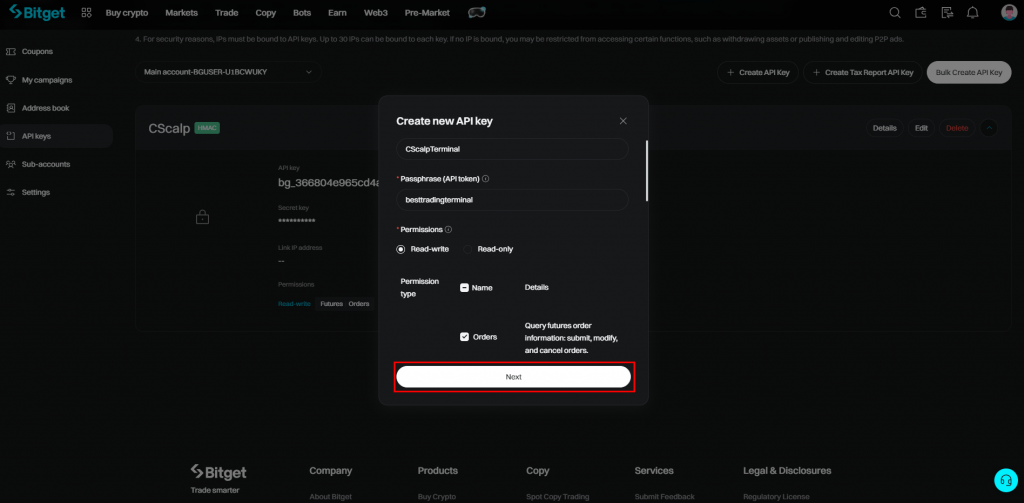
Set the name, password, and parameters for the API keys, click “Next”
Copy the “Access APIKey” and “SecretKey” to connect CScalp to Bitget. Note that the “SecretKey” is displayed only once when created. Copy it immediately to connect the terminal. It’s not necessary to save and keep the key in phone notes or on paper. If needed, you can always recreate the keys in your Bitget personal account.
Click “Confirm.”
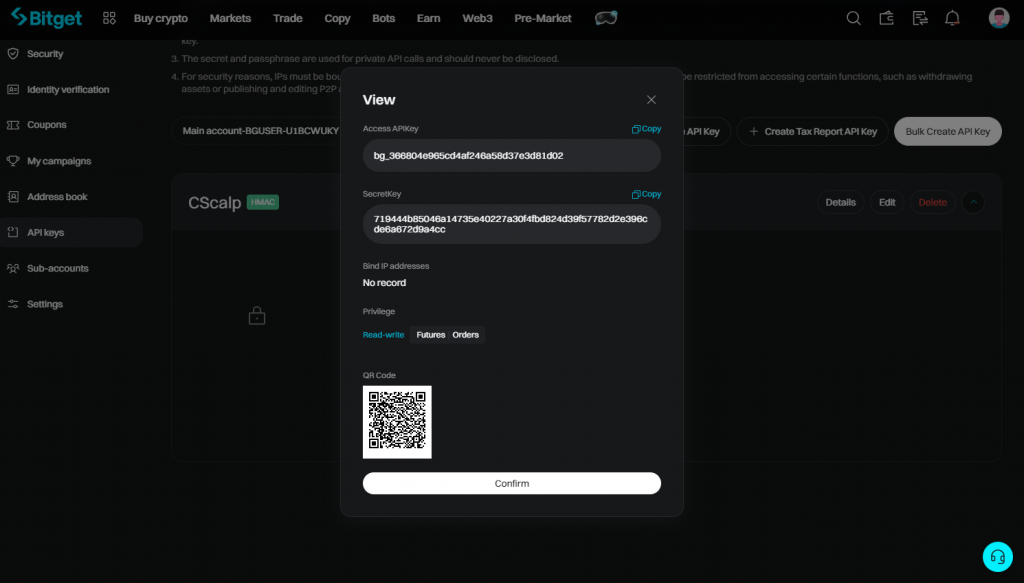
Copy the API keys and click “Confirm”
Done, you have created the Bitget API keys. Now, let’s connect the terminal to the exchange!
You can edit the key parameters by clicking “Edit.” After passing security verification (enter the code from the email and Google Authenticator at the end of the editing window), it will be possible to make changes.
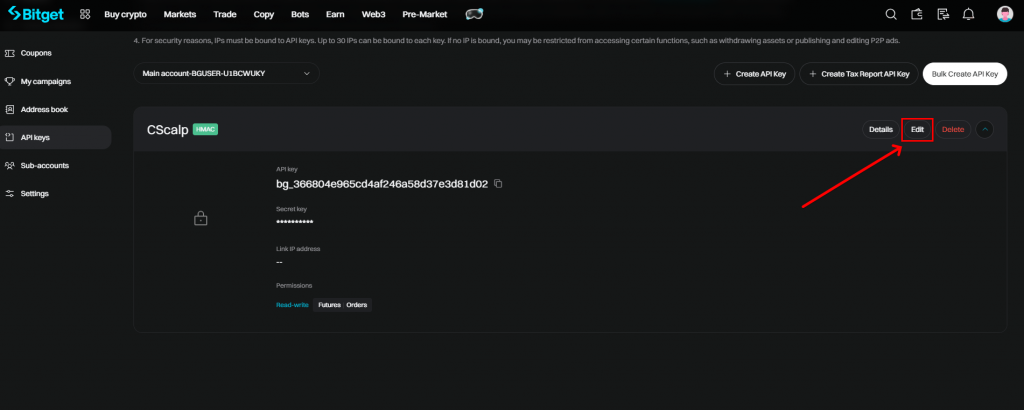
Click “Edit” to modify the API key parameters
Important! Never share your API keys with third parties.
How to Connect CScalp to Bitget
Launch CScalp, open the “Connections” tab. Then add a connection to the “Bitget: Futures” exchange, for example, by clicking on the “Add connection” button. Disable the “view mode” and enter the API keys with password. Then click “Next” and the connection to the exchange will begin.
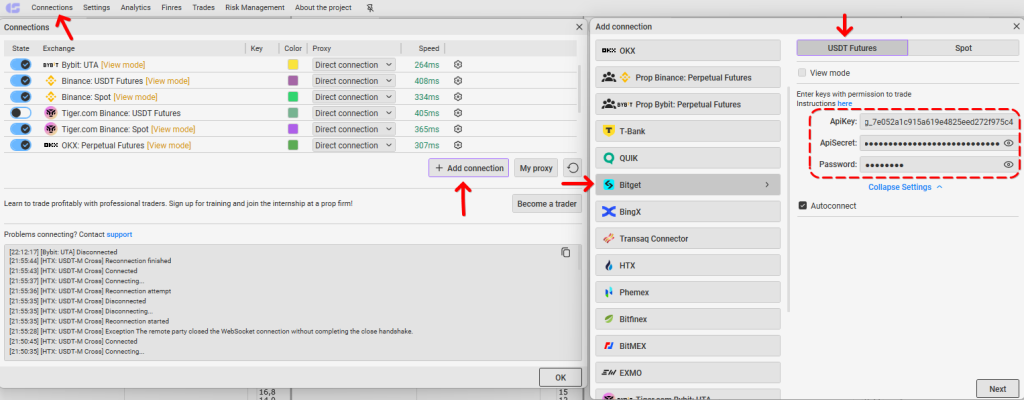
If the connection is successful, the icon will be blue, and at the bottom of the window the message “Connected”
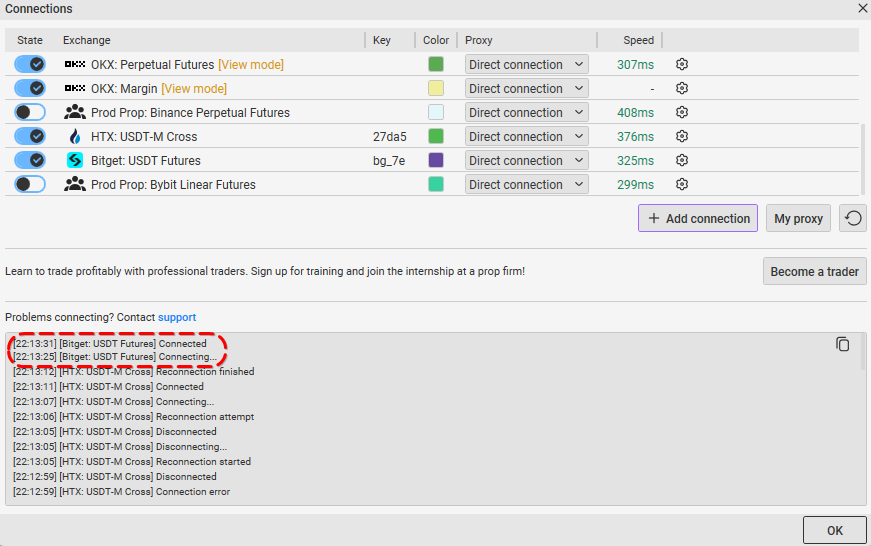
Done! Congratulations, you are connected to Bitget. Connecting to “Bitget Spot” is similar, with the same API keys and password.
How to Make Your First Trade on Bitget
To make your first trade on Bitget, fund your account on the exchange and visit our “How to Make the First Trade” article, to learn about the next steps.
If you encounter any issues, write to our support team. A real person will respond and help resolve the issue.
Not familiar with futures trading? Check out the free futures trading course by the CScalp team. It will help you understand the basics of futures trading and get started with your first trades. While the course is based on the Bybit exchange, it is also suitable for Bitget traders.
CScalp Security
API keys and other confidential data are encrypted and stored only on the user’s computer. They are not shared with third parties. The terminal does not have access to your funds and can not withdraw funds from the user’s account. All transactions (deposits, withdrawals, and transfers) are conducted by the user through their account on the exchange.
If third parties have access to your PC, set a PIN code to enter the terminal.
Join the CScalp Trading Community
Join our official trader's chat. Here you can communicate with other scalpers, find trading soulmates and discuss the market. We also have an exclusive chat for crypto traders!
Don't forget to subscribe to our official CScalp news channel, use trading signals and get to know our bot.
If you have any questions, just contact our platform's support via Telegram at @CScalp_support_bot. We will respond in a matter of seconds.
You can also visit our Discord channel and subscribe to the CScalp TV YouTube channel.
JOIN OUR CHAT