
HOW TO CONNECT CSCALP TO BINANCE
Date of update: 07.08.2025
Below you will find instructions for setting up the connection between the CScalp trading terminal and Binance. To start, you will need a Binance account and CScalp installed on your computer.
Referral Bonus
Want to reduce your Binance fees? Use our Binance referral code to receive the maximum discount for the whole year: 20% for Spot and 10% for futures trading on the Binance exchange. Click the “Sign Up On Binance” button to receive the discount now.
The guide has been prepared by the CScalp terminal team. You can get CScalp by leaving your e-mail in the form below.
How to Set Up the Connection (Briefly)
Text instructions for connecting CScalp to Binance perpetual futures are below the video.
Create a Wallet on the Exchange Website
To trade on Binance, you need to create a wallet. Below, you will find a detailed description of how to create a futures wallet.
1. Log in to Your Account on the Exchange Website
Log in to your account on the Binance exchange website. Please note that Binance has two trading platforms. One is for Spot trading, and the other is for futures trading. They share the same website and have the same API Keys.
2. Create an Account for Trading
Create an account on the Binance exchange. If you want to trade futures, hover your cursor over the wallet icon in the upper right corner of the screen and click on the “Futures” option.
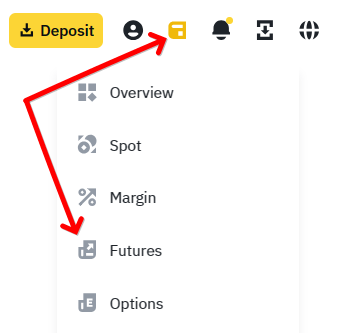
Determine the size of the leverage for the account and click on the “Open Futures Account” button. If you have a new account, we recommend creating your account using our referral link to receive the maximum discount for Binance Futures and Spot platforms.
Create an API Key and Secret Key
1. Go to “API Management”
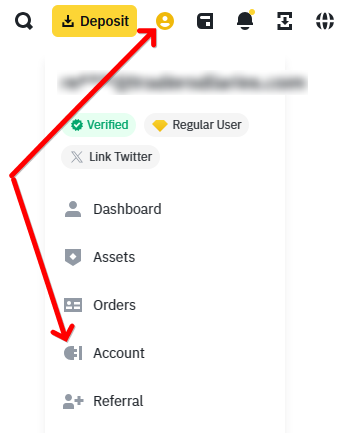
Hover over the profile icon and click on the “Account” button.
Important! To create API keys, complete intermediate Binance KYC verification
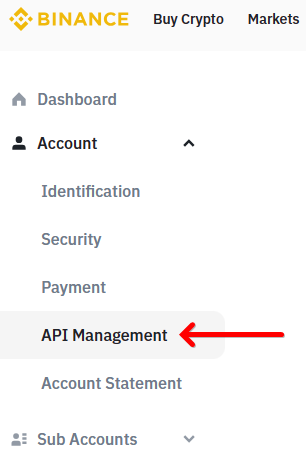
In the list on the left, select the “API Management” option.
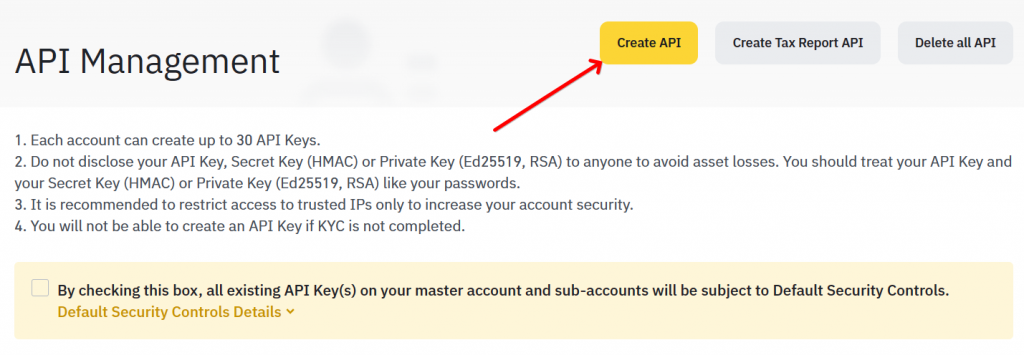
2. Choose the Type of Key and Assign It a Label
On the opened page, click “Create API”.
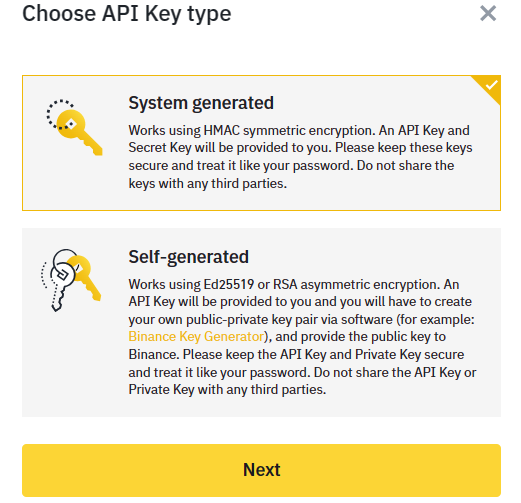
Select “System generated”, then click “Next”.
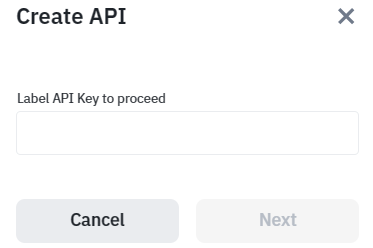
In the “Label API Key to proceed” field, enter the name of the new key (for example, “CScalp”). Click the “Next” button.
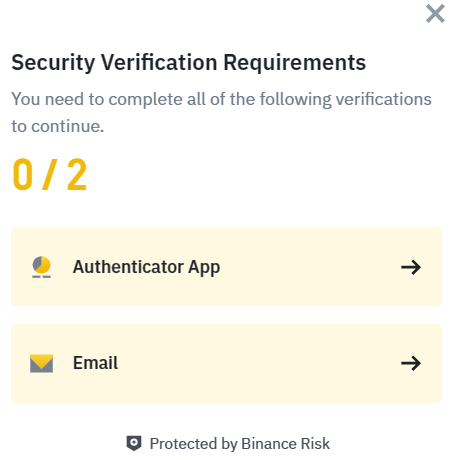
After clicking on the “Create” button, a choice of protection method will be offered. Choose the most convenient for you (without this step, there will be no access to create the API).
3. Enter the Confirmation Code
In the next window, you will have to pass a security check. The verification can be completed via Passkey, email, Google Authenticator, or your phone number.
Important! The “Secret Key” is displayed only once upon creation. Copy it when you see it to later paste it into CScalp. If you lose the “Secret Key,” a new API key pair can always be recreated. The “API Key” and “Secret Key” are analogs of a username and password. They are needed to connect to Binance.
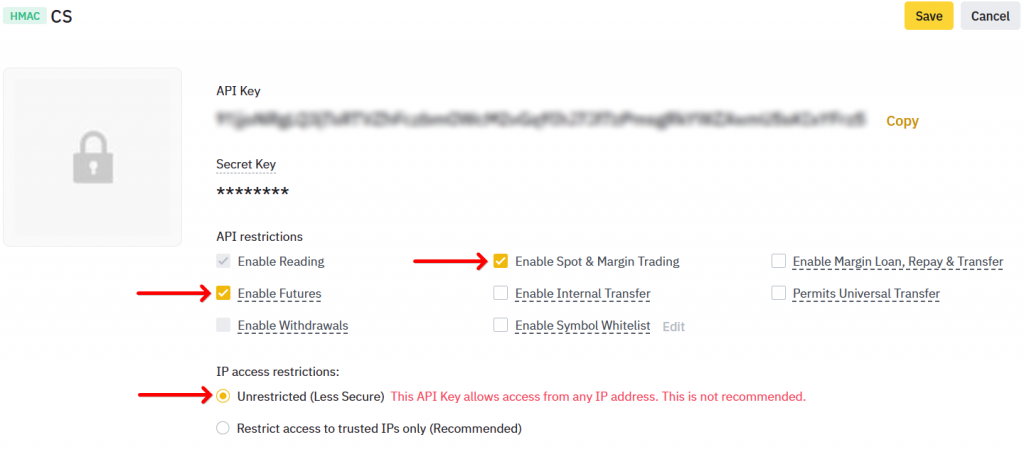
4. Check the “API Restrictions”
After passing the security check, you will be able to see your API Key and Secret Key. Copy and save the secret key, as it will be hidden later.
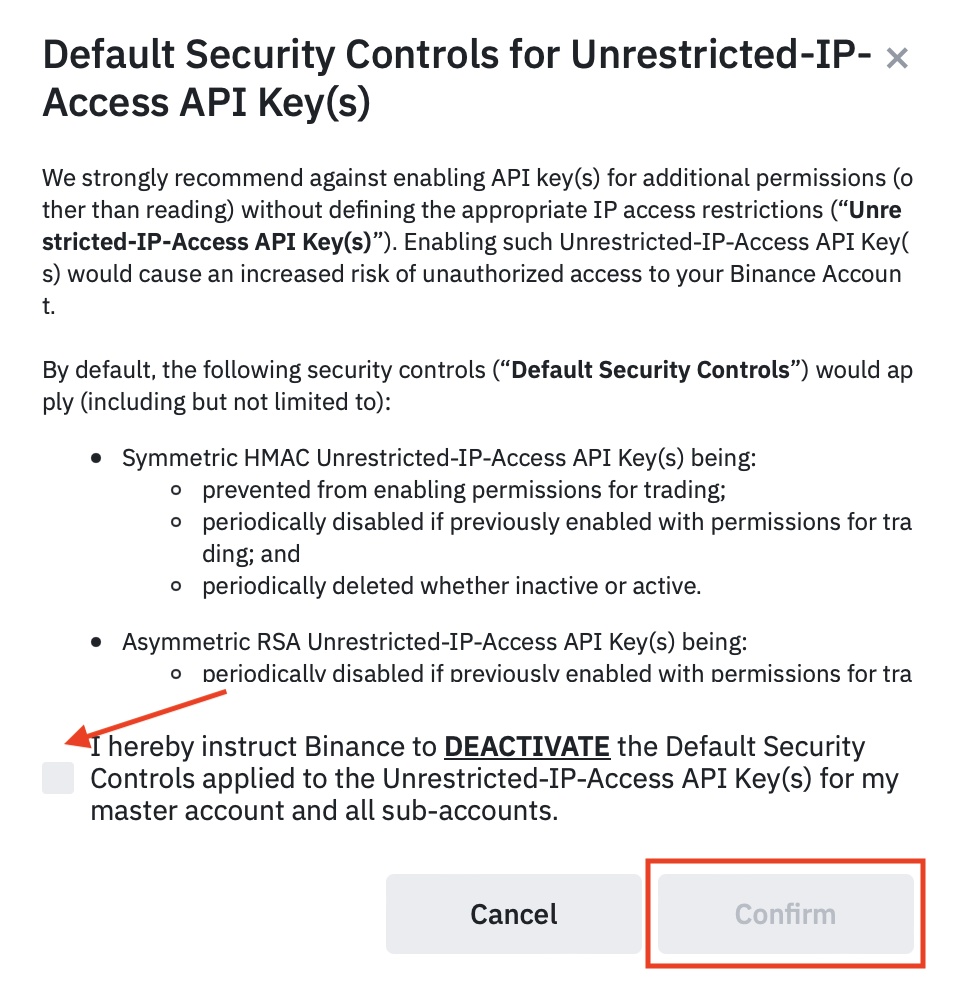
To set permissions for trading without IP address binding, uncheck the box that activates Default Security Controls.

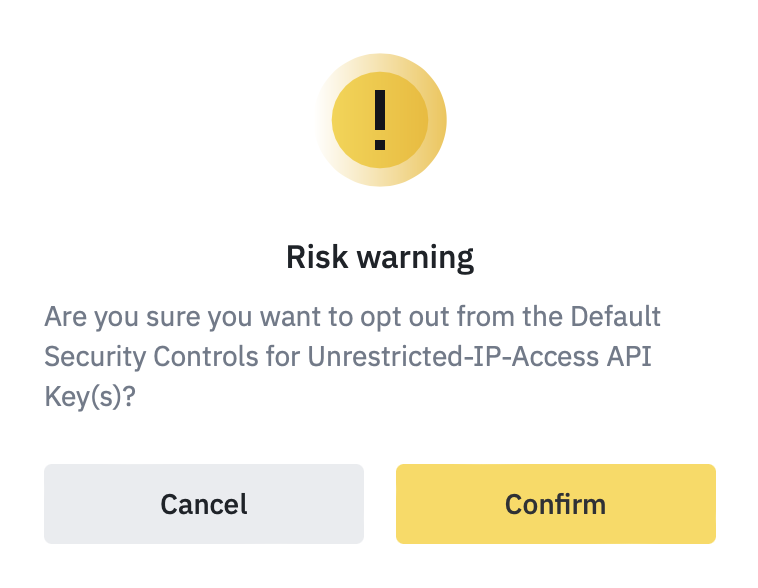
A window will appear where you have to confirm the exchange’s lack of liability when using API keys without binding to an IP address.
Tick the box and click the “Confirm” button.
After that, click the “Confirm” button again in the “Risk warning” window.
To trade futures, “enable” a special parameter on the exchange’s website. The parameter is called “Enable Futures.” You can manage it from your account. Make sure to check the “Enable Spot and Margin Trading” box.
Click “Save.”
Don’t forget to fund your wallet to start trading. Learn more about Binance deposit methods.
Congratulations, you have created an API Key and Secret Key. Now let’s move on to connecting CScalp to Binance.
Note: The “Enable Futures” parameter is active for 90 days if you have not specified a trusted IP address. After the specified period, you need to re-enable the parameter.
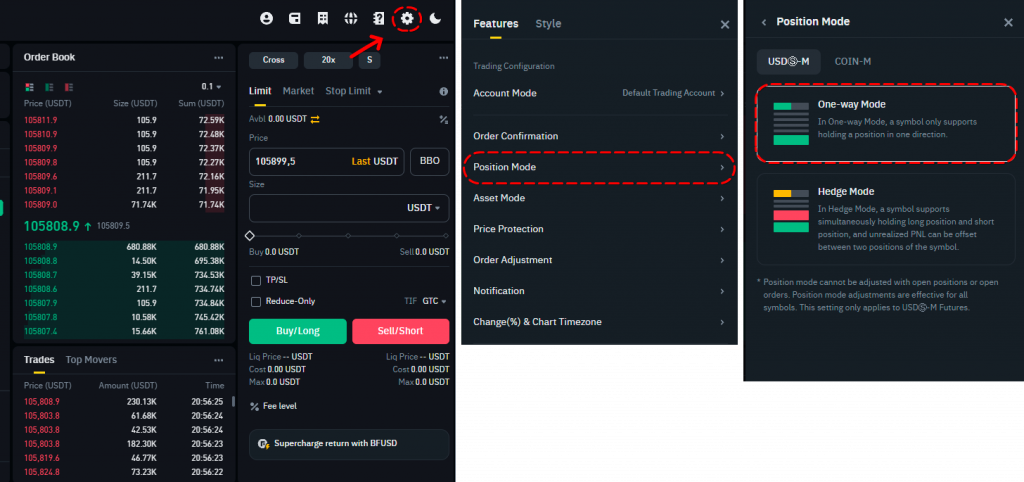
5. Disable Hedging Mode
Go to the “Futures” tab in the trading terminal and click on the settings in the top right corner. Navigate to the “Position Mode” settings and select “One-Way Mode“.
Connect CScalp to Binance
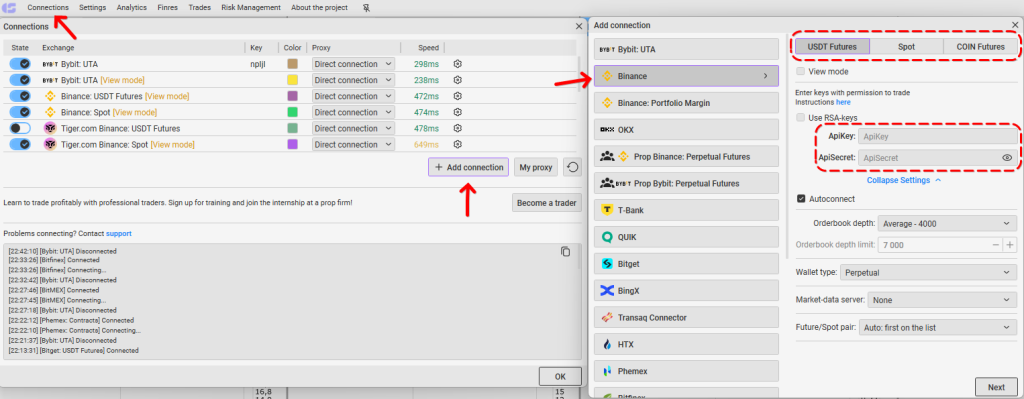
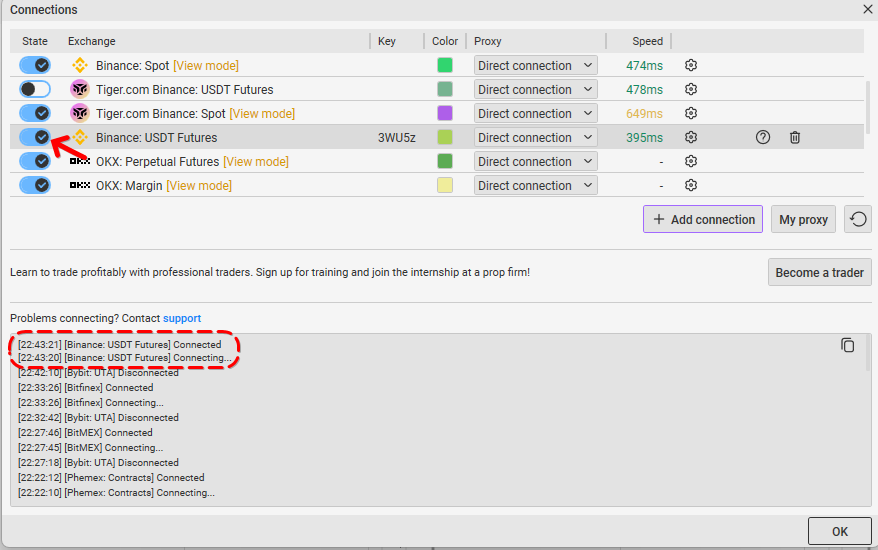
Launch CScalp, open the “Connections” tab. Then add a connection to the “Binance: USDT Futures” exchange, for example, by clicking on the “Add connection” button. Disable the “view mode” and enter the API keys. Then click “Next” and the connection to the exchange will begin.
Are you just starting to learn scalping? Take our free trading course. It will help you avoid common mistakes.
If the connection is successful, the icon will be blue, and at the bottom of the window the message “Connected”
Done! You have connected CScalp to the Binance USDT-M futures market. Connecting to “Binance: Spot” and “Binance COIN-M” is similar, with the same API keys.
Note: You can connect multiple Binance trading accounts in CScalp. Read more about this here.
4. Add an Order Book and Select an Instrument
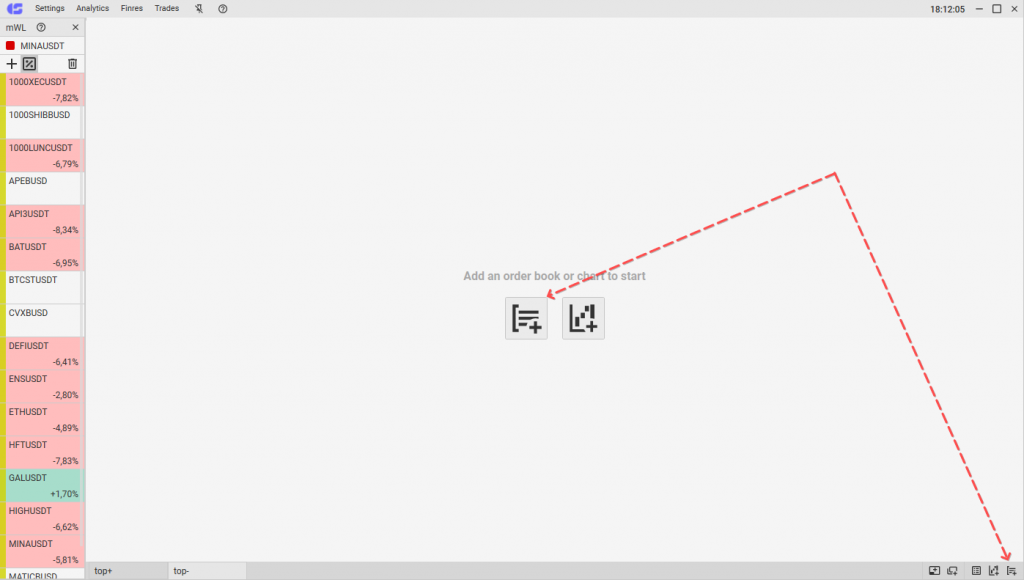
After setting up CScalp, add a new order book by clicking on the corresponding icon in the center of the terminal’s screen or the bottom right corner.
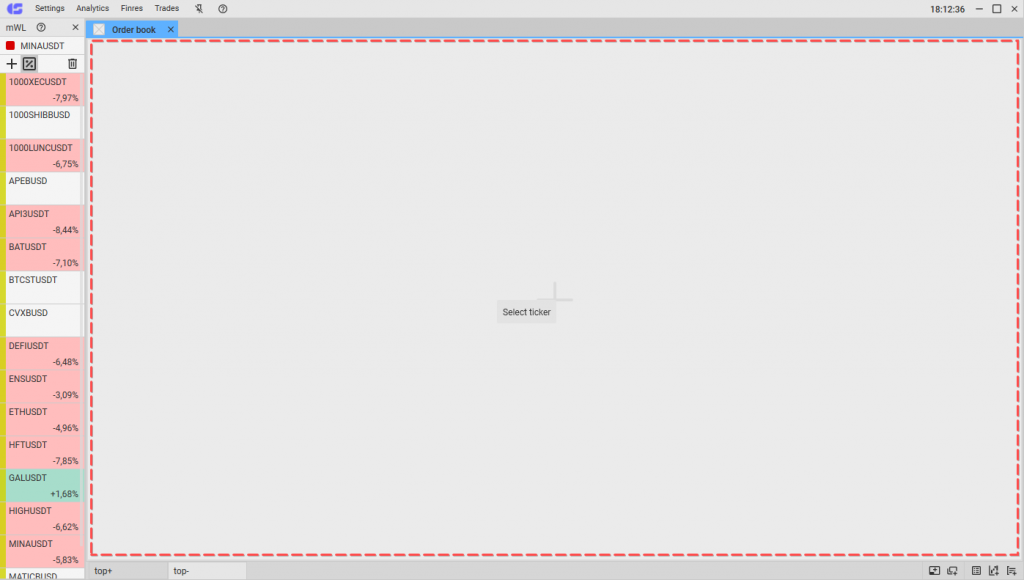
Then click on “Select ticker” at the top of the order book.
In the side menu of the opened window, specify the connection for which you want to select an instrument.
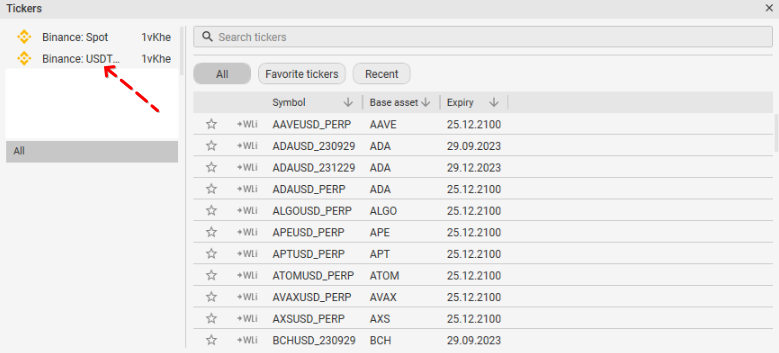
Then select an instrument from the list or via search (BTCUSDT, for example). Done, the trading instrument for Binance is selected!
Make Your First Trade
You can start trading now. Visit our “How to Make the First Trade” article, to learn about the next steps.
Frequently Asked Questions
Join the CScalp Trading Community
Join our official trader's chat. Here you can communicate with other scalpers, find trading soulmates and discuss the market. We also have an exclusive chat for crypto traders!
Don't forget to subscribe to our official CScalp news channel, use trading signals and get to know our bot.
If you have any questions, just contact our platform's support via Telegram at @CScalp_support_bot. We will respond in a matter of seconds.
You can also visit our Discord channel and subscribe to the CScalp TV YouTube channel.
JOIN OUR CHAT